No. The OSD menu is designed to be displayed only on the HDMI output video.
It cannot be displayed on the Web GUI (Live View screen).
*This is the same specification as the AW-UE4.
September 2026 Updated
Was this helpful?
Additional feedback is welcome.
Thank you for your feedback.
No. Power cannot be supplied using a USB Type-A to C cable. Please use a standards-compliant USB Type-C to C cable together with a USB Type-C compatible AC adapter.
Notes:
* This unit can be powered via USB-C (5 V / 3 A).
* Use the supplied USB Type-C to Type-C cable.
* A USB Type-A to C cable can only be used for data communication but the operation is not guaranteed. When a USB Type-A to C cable is used for communication, power must be supplied via PoE.
August 2026 Updated
Was this helpful?
Additional feedback is welcome.
Thank you for your feedback.
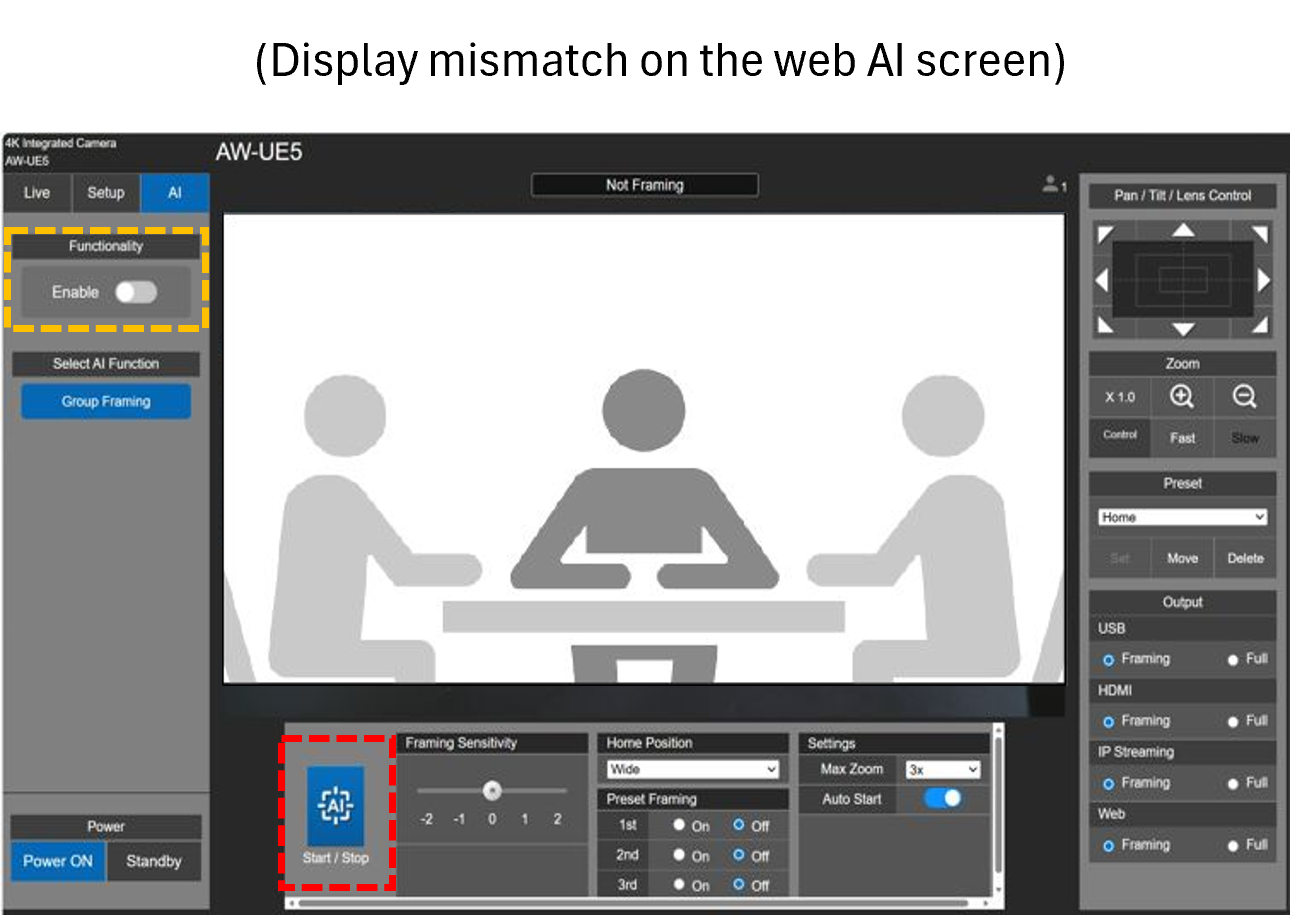
If AI Auto Framing is turned Off (disabled) while the web AI screen is not displayed,
the Start/Stop setting remains On (enabled), causing a display mismatch; however, AI Auto Framing is actually Off (disabled).
To use the function, set Functionality Setting to On (enabled) again.
August 2026 Updated
Was this helpful?
Additional feedback is welcome.
Thank you for your feedback.
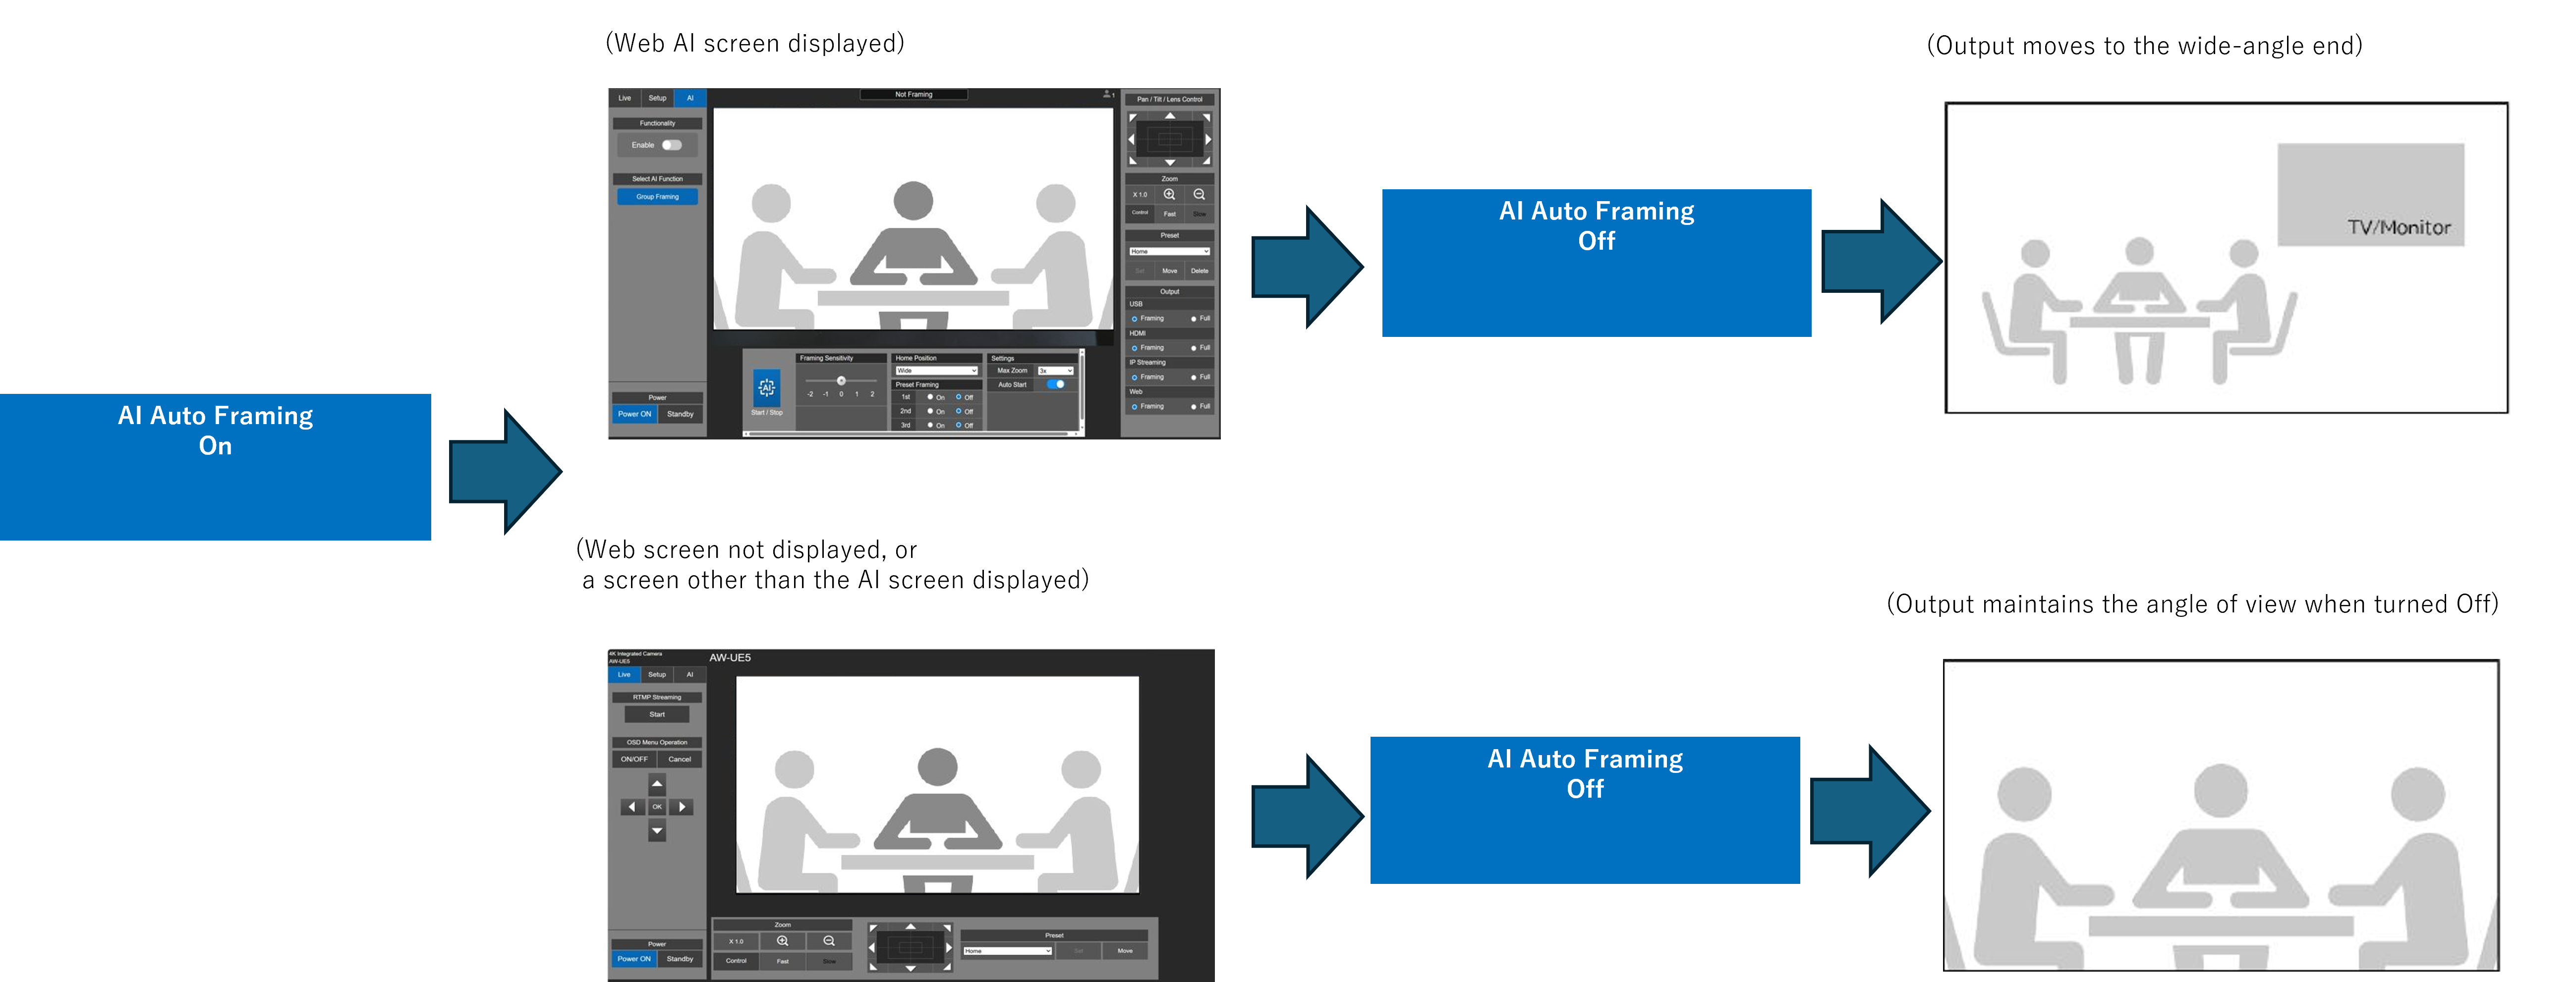
When AI Auto Framing is turned Off (disabled), the resulting angle of view varies depending on whether the web AI screen is being displayed.
If the web AI screen is displayed, the angle of view moves to the wide-angle end.
If the web AI screen is not displayed, the angle of view at the time the function was turned Off (disabled) is maintained.
* Operating pan, tilt, or zoom while AI Auto Framing is active turns AI Auto Framing Off (disabled).
August 2026 Updated
Was this helpful?
Additional feedback is welcome.
Thank you for your feedback.
If you change Output Web [Framing/Full] on the web AI screen while AI Auto Framing is operating,
AI Auto Framing is turned Off (disabled).
To use it again, set Functionality to On (enabled).
* Changing the setting from the camera menu does not turn AI Auto Framing Off (disabled).
August 2026 Updated
Was this helpful?
Additional feedback is welcome.
Thank you for your feedback.
When [Preset Framing] is not set to [On], only Group Framing operates.
When [Preset Framing] is set to [On]:
If no subject is detected within a configured [Preset Framing] area: normal Group Framing operates.
If a subject is detected within a configured [Preset Framing] area: Preset Framing operates.
August 2026 Updated
Was this helpful?
Additional feedback is welcome.
Thank you for your feedback.
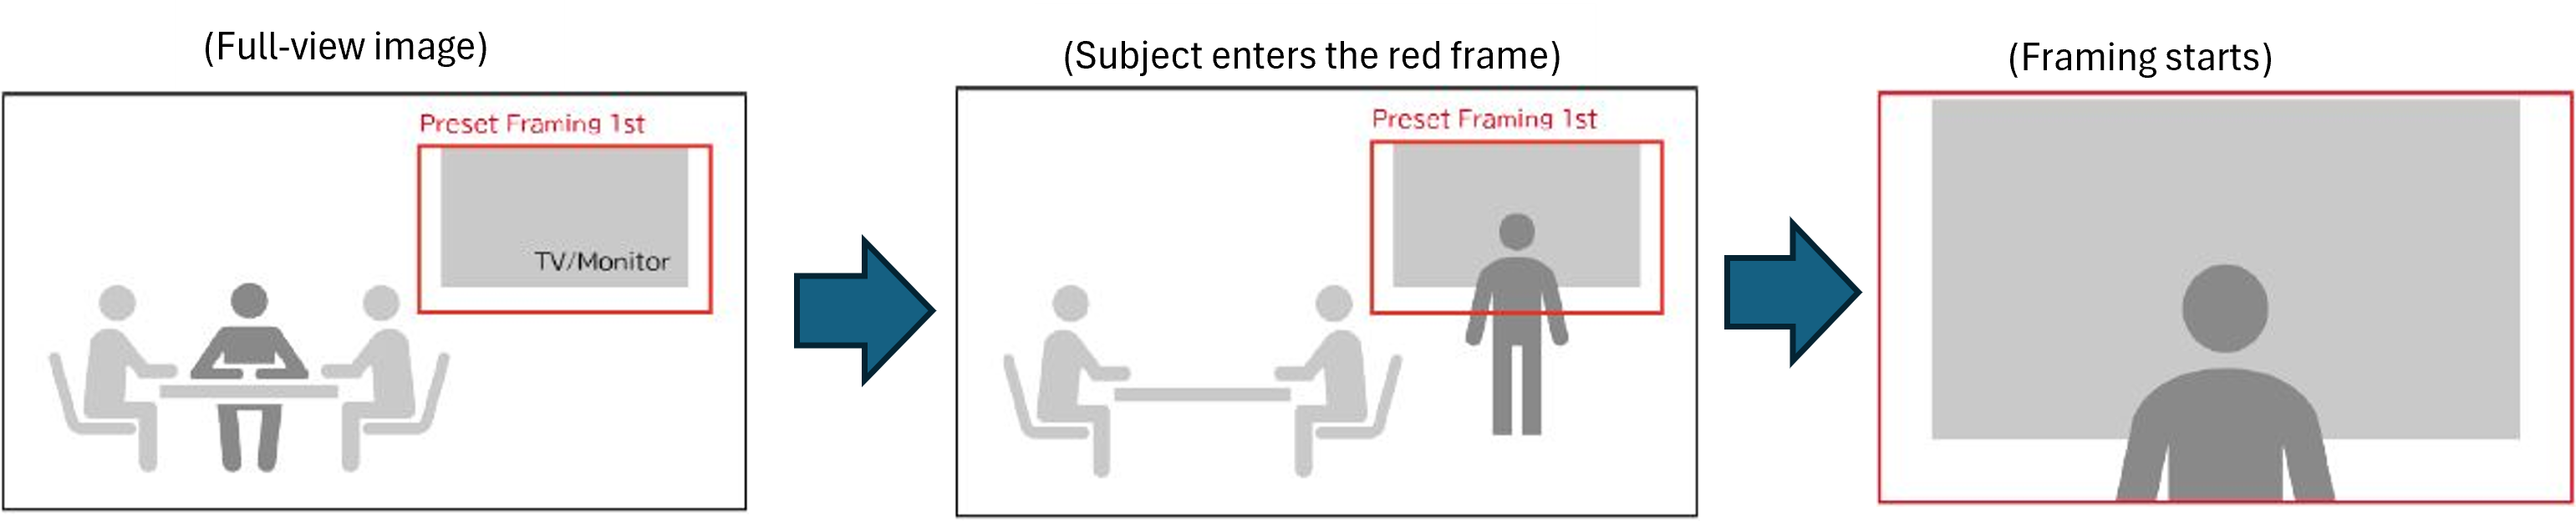
Preset Framing automatically switches to a registered angle of view when a person enters a preset area within the camera's shooting range (full angle of view).
It automates camera work even with a small operating staff.
When the camera detects a subject within a preset framing area, digital PTZ operates to recall that angle of view automatically.
In the example below, when the red frame (the 1st Preset Framing area) is configured and a subject is detected inside it, the angle of view defined by the red frame is recalled.
* This function is available only when Priority Mode is set to [ePTZ/AI].
The [Preset Framing] function supports up to three areas ([1st]-[3rd]).
If subjects are detected simultaneously within multiple configured areas, priority is assigned in the order [1st], [2nd], and [3rd].
The [Preset Framing] area with the lowest number takes priority, and its angle of view is recalled.
August 2026 Updated
Was this helpful?
Additional feedback is welcome.
Thank you for your feedback.
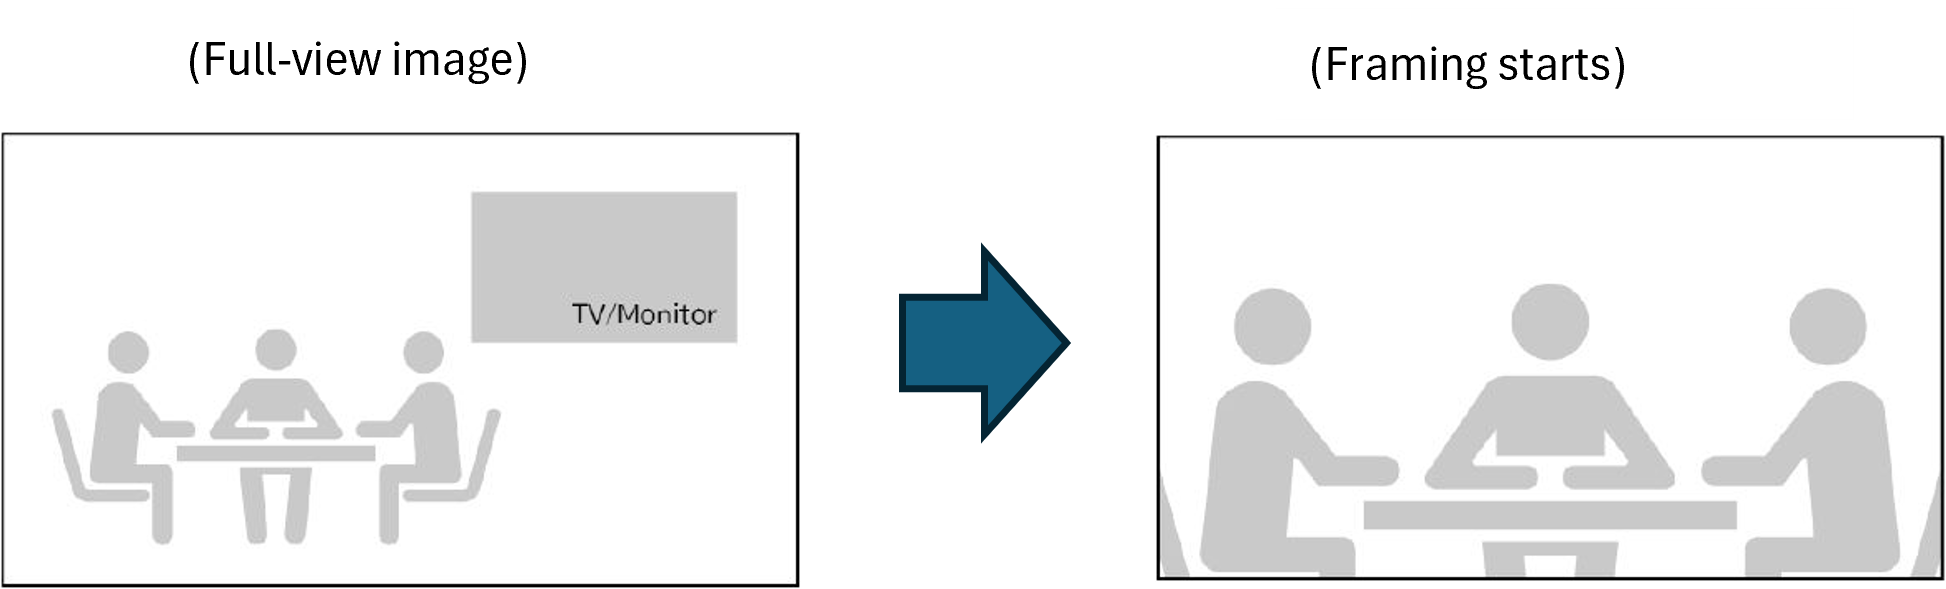
Group Framing automatically adjusts the angle of view so that all participants within the camera's shooting range (full angle of view) fit in the frame.
It readjusts to the optimal angle of view whenever people enter or leave during a meeting.
Digital PTZ operates continuously and automatically to frame the subjects detected by the camera in an optimal composition.
* This function is available only when Priority Mode is set to [ePTZ/AI].
August 2026 Updated
Was this helpful?
Additional feedback is welcome.
Thank you for your feedback.
The Operating Instructions can be downloaded from the following URL.
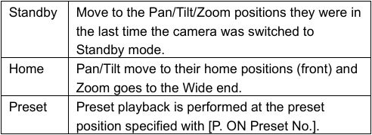
Yes. You can specify the pan/tilt/zoom position used at startup with the following setting. *Factory default setting: [Standby]
• Camera menu setting: CAMERA > Power On Position > [Standby/Home/Preset]
• Web screen setting: Setup > Image/Audio > Image > Image adjust > Lens > Power On Position > [Standby/Home/Preset]
When [Preset] is selected, specify the preset using the following setting.
• Camera menu setting: CAMERA > P.ON Preset No. > [1-100]
• Web screen setting: Setup > Image/Audio > Image > Image adjust > Lens > P.ON Preset No. > [Preset1-Preset100]
* If an unregistered preset number is selected, the unit operates in [Standby].
* If Priority Mode is set to [4K High Frame Rate], the unit starts at the wide-angle end regardless of this setting.
August 2026 Updated
Was this helpful?
Additional feedback is welcome.
Thank you for your feedback.
Are the [Wireless ID] settings (*) on this unit and the AW-RM50A (remote control) the same?
If the camera's power status indicator lamp flashes orange twice when you press an operation button on the AW-RM50A (remote control), the [Wireless ID] settings do not match.
The default [Wireless ID] setting for this unit is [CAM1].
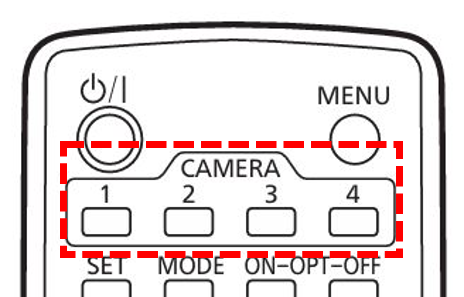
Press the [CAMERA 1] button on the AW-RM50A (remote control), and then press the desired operation button.
(*) The AW-RM50A (remote control) can control up to four cameras. This setting prevents interference when multiple cameras are controlled.
Match the remote control to the camera's [Wireless ID] by first selecting the camera to operate with the [CAMERA 1] to [CAMERA 4] buttons.
• Camera menu setting: SYSTEM > Wireless ID > [CAM1]-[CAM4]
• Web screen setting: Setup > Image/Audio > System > Wireless ID > [CAM1]-[CAM4] -> [Set]
(AW-RM50A)
August 2026 Updated
Was this helpful?
Additional feedback is welcome.
Thank you for your feedback.
This unit allows you to reset only the user name and login password.
Set the service switches on the connector panel to the positions shown below, and then turn on the unit.
When the reset is complete, the status indicator lamp flashes green.
Turn off the unit, return the service switches (SW1 and SW2) to OFF, and then turn the unit on again.
(Service Switches)
August 2026 Updated
Was this helpful?
Additional feedback is welcome.
Thank you for your feedback.
This unit can switch its output between the camera image and color bars. *Factory default setting: [Off]
• Camera menu setting: SYSTEM > Color Bars > [On/Off]
• Web screen setting: Setup > Image/Audio > System > Color Bars > [On/Off] -> [Set]
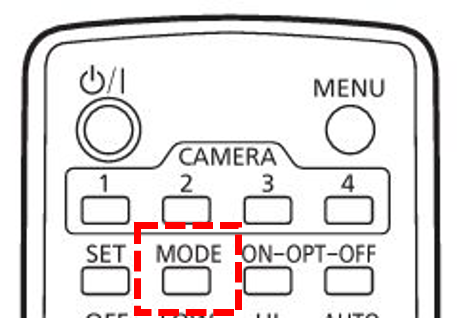
When using the AW-RM50A: Each press of the MODE button (shown below) switches between the camera image and color bars. (AW-RM50A)
August 2026 Updated
Was this helpful?
Additional feedback is welcome.
Thank you for your feedback.
This unit supports three languages: English, Japanese, and Simplified Chinese. *Factory default setting: [English]
• Camera menu setting: MAINTENANCE > Language > [English], [日本語], [简中]
• Web screen setting: Setup > Maintenance > Language > [English], [日本語], [简中] ->[Set]
August 2026 Updated
Was this helpful?
Additional feedback is welcome.
Thank you for your feedback.
Change the camera menu settings according to the camera's installation orientation. *Factory default setting: [Desktop]
• Camera menu setting: SYSTEM > Install Position > [Desktop] or [Hanging]
• Web screen setting: Setup > Image/Audio > System > Install Position > [Desktop] or [Hanging] -> [Set]
* You can also flip the camera image horizontally using the following Mirror setting.
• Camera menu setting: SYSTEM > Mirror > [On] *Factory default setting: [Off]
• Web screen setting: Setup > Image/Audio > System > Mirror > [On] -> [Set]
August 2026 Updated
Was this helpful?
Additional feedback is welcome.
Thank you for your feedback.
When Priority Mode is set to [4K High Frame Rate], all AI functions and digital PTZ are disabled because priority is given to outputting 4K resolution at a high frame rate.
August 2026 Updated
Was this helpful?
Additional feedback is welcome.
Thank you for your feedback.
This unit's Priority Mode lets you select one of two modes optimized either for high-quality video performance or for advanced AI functions.
The setting can be changed from the camera menu or the web screen. *Factory default setting: [ePTZ/AI]
• Camera menu setting: SYSTEM > Priority Mode > [Select mode]
• Web screen setting: Setup > Basic > Priority Mode > [Select mode] -> [Set]
Priority Mode
▪ [4K High Frame Rate]: Prioritizes outputting 4K resolution at a high frame rate.
• Supports 4K (3840 x 2160) signals at up to 60p via HDMI, USB, and IP.
• Disables all AI functions and digital PTZ to support high-bandwidth video transmission.
▪ [ePTZ/AI]: Prioritizes digital PTZ and AI functions.
• Supports AI functions such as digital PTZ and Group Framing.
• Limits 4K (3840 x 2160) output via HDMI, USB, and IP to a maximum of 30p to support AI processing.
* For output formats and resolutions, refer to the [Priority Mode] page in the Operating Instructions <Operations and Settings>. https://pro-av.panasonic.net/manual/en/
August 2026 Updated
Was this helpful?
Additional feedback is welcome.
Thank you for your feedback.
Use a Category 5e or higher LAN cable with a maximum length of 100 m.
When connecting this unit directly to a computer or similar device, use a crossover cable.
When connecting it to a switching hub or similar device, use a straight-through cable.
August 2026 Updated
Was this helpful?
Additional feedback is welcome.
Thank you for your feedback.
Check the following:
• Disconnect the USB cable, then reconnect it.
• Use the USB cable supplied with this unit.
• Connect the unit to a USB Type-C port on the computer that supports Power Delivery.
* The unit may not start when connected to a USB port that does not support Power Delivery.
August 2026 Updated
Was this helpful?
Additional feedback is welcome.
Thank you for your feedback.
USB Type-C.
* This unit can be powered via a USB cable (Type-C to C) (5 V/3 A).
* Use the included USB cable (Type-C to C).
August 2026 Updated
Was this helpful?
Additional feedback is welcome.
Thank you for your feedback.
Use a USB PD (Power Delivery) AC adapter that supports USB Type-C and provides 5 V/3 A or more. No specific product is recommended.
When using an AC adapter, use the included USB cable (Type-C to C).
August 2026 Updated
Was this helpful?
Additional feedback is welcome.
Thank you for your feedback.
A USB cable (Type-C to C) is included.
An AC adapter is not included.
* When using an AC adapter to supply power, use the included USB cable (Type-C to C),
and use a USB PD (Power Delivery) AC adapter that supports USB Type-C and provides 5 V/3 A or more.
August 2026 Updated
Was this helpful?
Additional feedback is welcome.
Thank you for your feedback.
The built-in microphone can be turned on or off in the settings. *Factory default setting: [On]
• Camera menu setting: SYSTEM > Mic > [On/Off]
• Web screen setting: Setup > Image/Audio > System > Mic > [On/Off] -> [Set]
August 2026 Updated
Was this helpful?
Additional feedback is welcome.
Thank you for your feedback.
Up to 100 preset memory positions can be registered.
* The number of preset memory positions that can be registered varies depending on the controller used.
* The AW-RM50A can register up to 12 positions.
August 2026 Updated
Was this helpful?
Additional feedback is welcome.
Thank you for your feedback.
This unit supports the following formats.
[4K formats]
3840x2160/60p, 59.94p, 50p * Available only when Priority Mode is set to [4K High Frame Rate]
3840x2160/30p, 29.97p, 25p * Available only when Priority Mode is set to [ePTZ/AI]
[HD formats]
1080/60p, 59.94p, 50p, 30p, 29.97p, 25p * Available only when Priority Mode is set to [ePTZ/AI]
1280x720/60p, 59.94p, 50p * Available only when Priority Mode is set to [ePTZ/AI]
* The output format varies depending on the Priority Mode setting.
For details, refer to the "Priority Mode" page in the Operating Instructions <Operations and Settings>. https://pro-av.panasonic.net/manual/en/
August 2026 Updated
Was this helpful?
Additional feedback is welcome.
Thank you for your feedback.
It is not supported. There are no plans to support it in the future.
August 2026 Updated
Was this helpful?
Additional feedback is welcome.
Thank you for your feedback.
The supported controller is the AW-RM50A.
At the time of the AW-UE5WG/KG release, some functions are not available when using the AW-RP200, AW-RP150, or AW-RP60. (Support is planned for a future update.)
There is one 1/4-20 UNC threaded mounting hole on the bottom of the unit.
August 2026 Updated
Was this helpful?
Additional feedback is welcome.
Thank you for your feedback.
This unit supports PoE. (Compliant with the IEEE 802.3af standard)
August 2026 Updated
Was this helpful?
Additional feedback is welcome.
Thank you for your feedback.
This unit uses a fixed-focus lens designed to focus on the entire subject when it is at least 300 mm away.
If the subject is 300 mm or less from the camera, it may not be in focus. Move the subject at least 300 mm away from the camera.
August 2026 Updated
Was this helpful?
Additional feedback is welcome.
Thank you for your feedback.
When the LDC function is set to Off Horizontal: 121.8°, Vertical: 87.8°
When the LDC function is set to On Horizontal: 121.0°, Vertical: 87.8°
• The LDC (Lens Distortion Correction) function reduces distortion (curvature) of straight lines displayed at the edges of the screen. *Factory default setting: [Off]
• Camera menu setting: CAMERA > LDC > [On/Off]
• Web screen setting: Setup > Image/Audio > Image > Image adjust > Lens > LDC > [On/Off]
August 2026 Updated
Was this helpful?
Additional feedback is welcome.
Thank you for your feedback.
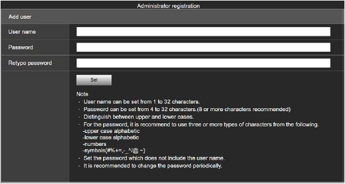
The AW-UE5's network functions will not operate unless the initial account is configured.
Initial account setup is also required when connecting remote controllers such as the AW-RP200, AW-RP150, or AW-RP60, or external control devices over a network.
A computer is required to configure the initial account.
For details on configuring the initial account, refer to the [Initial Account Settings] page in the AW-UE5 Operating Instructions <Basics>. https://pro-av.panasonic.net/manual/en/
If the initial account has not been configured, the AW-RP200, AW-RP150, and AW-RP60 can detect the AW-UE5;
however, they cannot control it because a connection with the remote controller has not been established.
 remains On (enabled), causing a display mismatch; however, AI Auto Framing is actually Off (disabled).
 to On (enabled) again.